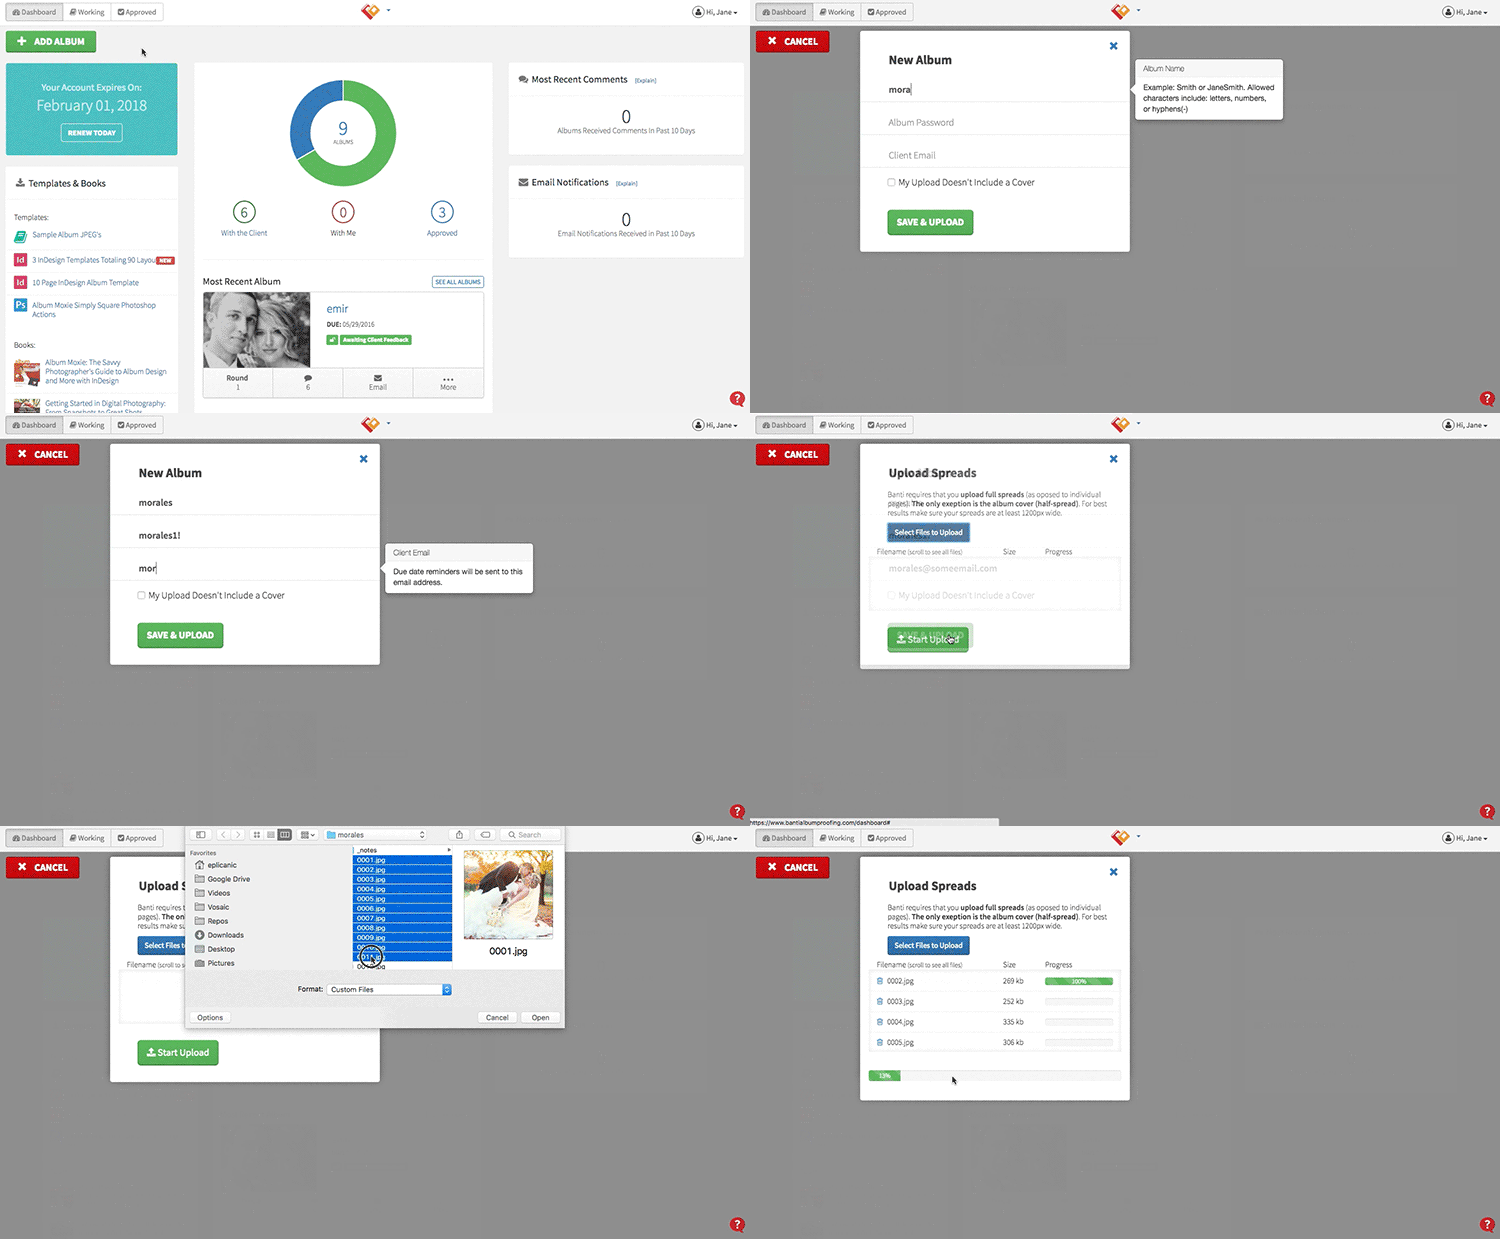
- Press the “Add Album” button
- Enter album name, password, and client email
- Press “Save & Upload” button
- On the next screen select album spreads you’d like to upload and press “Start Upload“
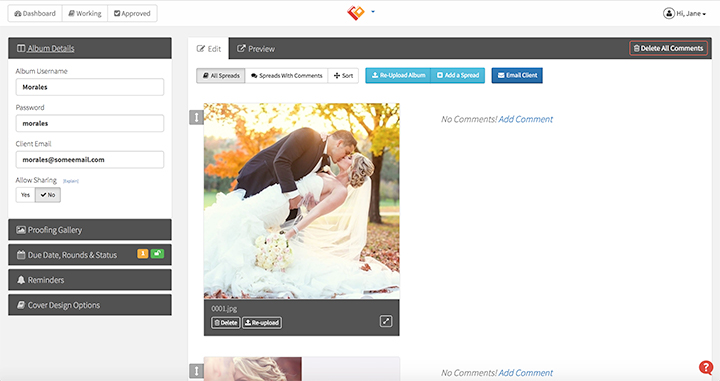
Once uploaded the album details screen will load allowing you to make adjustments before sending it to your client for proofing.

Another thing you should do before sending the album for proofing is set due dates & reminders, so that your client doesn’t drop the ball on the proofing process.

